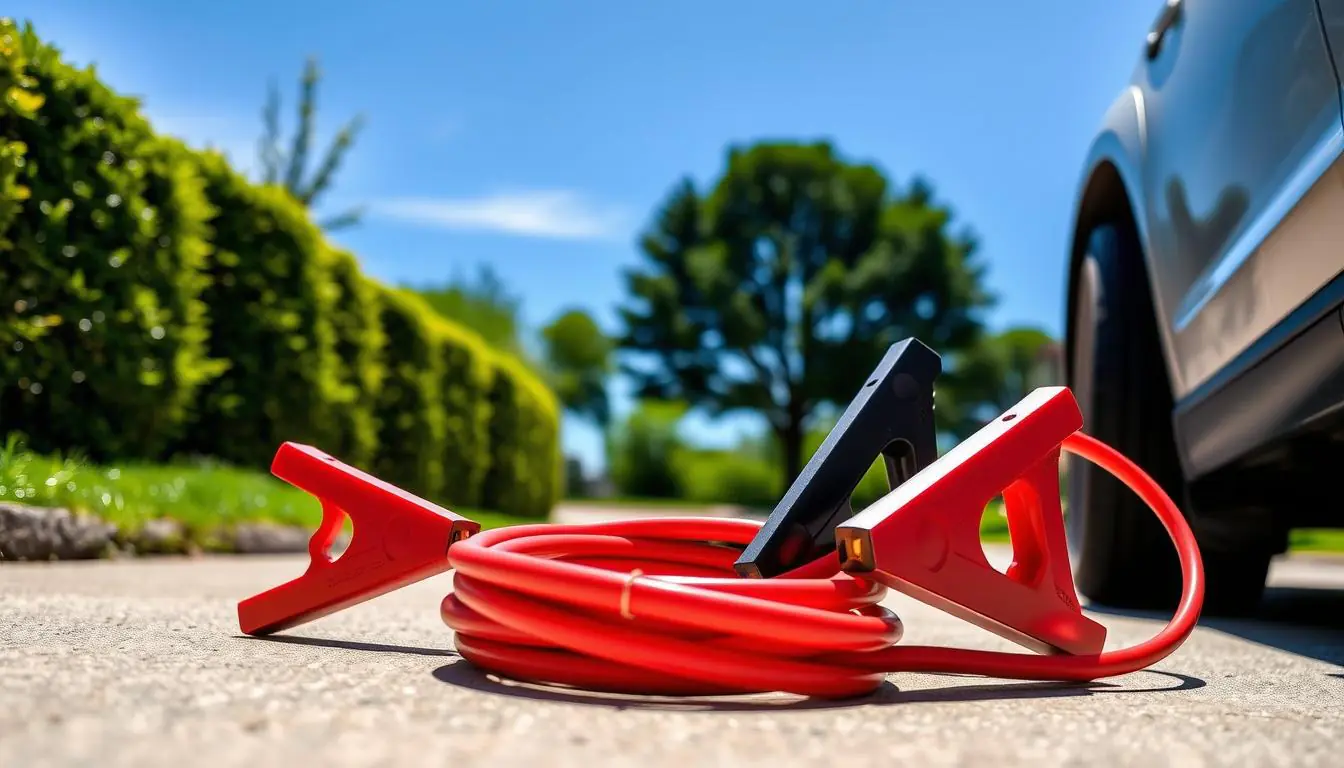
Picture this: a freezing winter morning, you’re already running late, and your car just… won’t… start. Ugh! A dead battery is the worst, especially when there’s no help right nearby. That’s exactly when I realized how crucial it is to know how to use 30 ft jumper cables. These extra-long cables aren’t just convenient; they can be absolute lifesavers, giving you the reach you desperately need in tricky spots.
Honestly, learning how to handle heavy duty booster cables is a skill every driver should have. And those 30 ft jumper cables? They’re incredibly versatile. They make it possible to connect two vehicles even if they’re parked awkwardly or in tight spaces where standard cables just won’t cut it.
Key Things to Remember
- 30 ft jumper cables give you much-needed extra reach in car emergencies.
- Knowing the right way to connect cables is super important for your safety.
- Longer cables = more flexibility when cars are parked in tricky positions.
- Always give your cables a quick check before using them to make sure they’re in good shape.
- Storing and maintaining your cables properly helps them last way longer.
Getting to Know Your 30 ft Jumper Cables

Car electrical problems seem to pop up at the worst times, don’t they? That’s why having long battery cables in your trunk is a smart move. Think of emergency car jump starters with extra length as your backup plan when regular cables just aren’t long enough.
So, What Exactly Are 30 ft Jumper Cables?
Long vehicle jump leads are basically specialized cables designed for jump-starting vehicles, but they’re a generous 30 feet long – much longer than the standard ones. This extra length makes them incredibly handy for car owners.
- They’re usually built with heavy-duty copper wire for good power flow.
- They have a thick, high-quality rubber coating for insulation and safety.
- They’re designed to work with various types of vehicles.
- They offer better electrical conductivity compared to thinner, shorter cables.
Why Go Long? The Perks of Longer Cables
Longer jumper cables bring some serious advantages, especially when you’re in a tight spot. They give you much more freedom in how you position the two cars, making the whole jump-starting process way easier.
| Cable Length | Positioning Flexibility | Ease of Use Rating |
|---|---|---|
| Standard (around 12 ft) | Pretty Limited | 6/10 |
| 30 ft Cables | Way More Flexible | 9/10 |
Where They Shine: Common Uses
Long battery cables are perfect for those situations where standard cables just won’t reach. Think truckers, RV owners, or anyone dealing with awkwardly parked cars – these folks often find extra-long cables essential.
“Trust me, having 30 ft jumper cables can be the difference between getting back on the road fast or being stuck for hours.” – An Experienced Automotive Technician
- Jump starting larger vehicles like trucks or RVs.
- Reaching batteries in hard-to-access spots.
- Dealing with challenging parking situations (like head-in parking).
- Used often by professional automotive services for their versatility.
Safety First! Precautions Before You Jump

Okay, before you even think about connecting those cables, let’s talk safety. Using extended length jump cables isn’t rocket science, but you absolutely need to take precautions to protect yourself and your car.
Protect Yourself: Personal Safety Tips
When you’re handling a 30-foot jumper wire set, your safety is paramount. Here’s what you need to do:
- Wear safety glasses! Battery acid splashing is rare, but you don’t want it near your eyes.
- Put on insulated gloves to avoid any chance of electrical shock.
- Make sure you’re working in a well-ventilated area, away from sparks or flames (batteries can release flammable gas).
- Take off any metal jewelry (rings, watches) that could accidentally touch terminals and conduct electricity.
“A little preparation goes a long way in preventing electrical hazards when jump-starting.”
Choosing the Right Gear: Models and Brands
Picking the right extended length jump cables matters. Look for these key features:
- Gauge Thickness: Lower numbers (like 2 or 4 gauge) mean thicker wire and better power flow, especially for longer cables.
- Clamp Quality: Ensure the clamps are strong, grip well, and are properly insulated.
- Length: You’re here for 30 ft, but make sure it suits your typical needs.
- Amp Rating: Check that the cables can handle the amperage needed for your vehicle (check your owner’s manual if unsure).
Give ‘Em a Once-Over: Checking Cable Conditions
Before you connect anything, give your 30-foot jumper wire set a good inspection:
- Look closely for any cuts, cracks, or fraying in the wire insulation.
- Check the clamps – are they sturdy? Is the copper conductor inside clean and intact?
- Make sure the clamp springs are tight and provide a strong connection.
- Look for any rust or corrosion on the clamps or terminals.
Remember, using damaged cables is risky and might not even work properly. Safety first!
Getting Ready for the Jump

Alright, let’s get ready to jump-start that car! A little prep work and having the right gear makes the whole process safer and smoother when dealing with car emergencies.
Gather Your Gear
Before you start, make sure you have everything you need handy. When using 30-feet battery jumper cables, grab these items:
- Your trusty long booster cable packs (with heavy-duty clamps!).
- Protective rubber or insulated gloves.
- A flashlight (especially if it’s dark – phone flashlights work in a pinch!).
- Safety glasses.
- Your vehicle owner’s manual (it often has specific jump-starting instructions).
Find a Willing Helper (Vehicle)
You’ll need a vehicle with a good, working battery. Make sure its battery voltage matches your car’s (most cars are 12V). Park the working car close enough so your 30-feet cables can comfortably reach both batteries without being stretched tight.
| Cable Gauge (Lower=Thicker) | Good For Vehicle Type | Typical Amperage Support |
|---|---|---|
| 2 Gauge | Large Trucks/Vans, Heavy Duty Use | 600-900 Amps |
| 4-6 Gauge | Most Cars, SUVs, Standard Trucks | 400-600 Amps |
| 8 Gauge | Sedans/Compact Cars | 300-500 Amps |
| 10 Gauge | Smaller Vehicles (Less Common for 30ft) | 200-400 Amps |
Generally, for 30 ft cables, you want a lower gauge (thicker wire) like 2 or 4 gauge to minimize power loss over the distance.
Check Out the Batteries
Before connecting anything, take a quick look at both car batteries:
- Look for obvious cracks, leaks, or damage. If a battery looks damaged, don’t attempt to jump it.
- If the terminals look corroded (covered in white or blue fuzzy stuff), clean them carefully with a wire brush or battery terminal cleaner if you have one. Good contact is key!
- Identify the positive (+) and negative (-) terminals on both batteries. They’re usually clearly marked.
- Keep metal tools and your metal jewelry away from the batteries while you work.
Pro Tip: Always glance at your owner’s manual! It might have specific jump-start points or warnings about your car’s electronics.
Taking a few minutes to prepare properly really increases your chances of a successful jump-start and keeps everyone safe.
The Right Way to Jump Start: Techniques Matter

Did you know battery issues cause a huge chunk of car breakdowns? Yep, around 30%! That makes knowing how to jump-start a car a super valuable skill. While lots of drivers (about 75%) carry jumper cables, using them correctly is what really counts to avoid extra trouble or damage.
Jump-starting requires focus. It’s easy to make mistakes, especially if you’re new to it, and unfortunately, those mistakes can sometimes mess up your car’s sensitive electrical parts. Let’s break down the right way to do it.
Your Step-by-Step Jump Starting Guide
- Park the working car close enough for the cables to reach, but make sure the cars aren’t touching. Put both cars in Park (or Neutral for manuals) and turn off the ignitions. Engage the parking brakes on both vehicles.
- Open the hoods and locate the batteries in both cars. Sometimes they’re hidden under covers or even in the trunk!
- Identify the positive (+) and negative (-) terminals on each battery. The positive is usually marked red or with a “+”, the negative black or with a “-“.
- Untangle your 30 ft jumper cables and make sure the clamps aren’t touching each other.
Connecting the Cables: The Dos and Don’ts (Super Important!)
Think “Red to Dead, Red to Good, Black to Good, Black to Ground.”
- DO: Connect one RED clamp to the POSITIVE (+) terminal of the DEAD battery (the car that won’t start).
- DO: Connect the other RED clamp to the POSITIVE (+) terminal of the GOOD battery (the working car).
- DO: Connect one BLACK clamp to the NEGATIVE (-) terminal of the GOOD battery.
- DO NOT: Connect the final BLACK clamp to the NEGATIVE (-) terminal of the DEAD battery! This can cause sparks right near the battery.
- DO: Connect the FINAL BLACK clamp to an unpainted metal surface on the engine block or frame of the DEAD car, away from the battery and moving parts. A bolt or bracket usually works well. This is your ground connection.
“Getting the connection sequence right with your automotive cables is the difference between a quick fix and potentially frying your car’s electronics.” – An Experienced Automotive Technician
Oops! Common Mistakes to Steer Clear Of
A whopping 90% of jumper cable mishaps come from incorrect connections. Common slip-ups include mixing up positive and negative terminals (reversing polarity), letting the metal clamps touch each other while connected, or trying to jump a 12V car with a 24V system (like a big rig).
Always double-check your connections before starting the cars. If you’re ever unsure or feel uncomfortable, it’s always smartest to call for roadside assistance or a knowledgeable friend.
After the Jump: What’s Next?

Hooray, the car started! But you’re not quite done yet. Taking the right steps after the jump is important for your battery and electrical system. Plus, you need to disconnect and store those heavy duty booster cables properly.
Disconnecting Cables Safely: The Reverse Order
When removing your long battery cables, be just as careful as when you connected them to avoid sparks or shorts. Follow these steps – basically the reverse of how you connected them:
- Start by removing the BLACK clamp from the unpainted metal ground point on the CAR THAT WAS JUMPED.
- Remove the BLACK clamp from the NEGATIVE (-) terminal of the GOOD battery.
- Remove the RED clamp from the POSITIVE (+) terminal of the GOOD battery.
- Finally, remove the RED clamp from the POSITIVE (+) terminal of the CAR THAT WAS JUMPED.
- Make absolutely sure the clamps don’t touch each other or any metal parts while you’re disconnecting them.
- Keep the cables clear of any moving engine parts like fans or belts.
“Removing the cables carefully is just as crucial as connecting them correctly.” – Automotive Safety Experts
Is the Battery Okay? Checking Functionality
After the jump-start gets the engine running, let the car run for a bit to help recharge the battery:
- Keep the engine running for at least 15-20 minutes (longer if possible, maybe take it for a drive). This gives the alternator time to put some charge back into the battery.
- Keep an eye on your dashboard for any warning lights.
- If you have a multimeter, you can test the battery voltage after running it (should be around 12.4-12.7V when off, and 13.7-14.7V when running).
- If the battery dies again soon after, or if things still seem off, it’s a good idea to get the battery professionally tested. It might be time for a replacement.
Keeping Things Running Smoothly: Final Maintenance Tips
| Maintenance Action | How Often? |
|---|---|
| Check Battery Voltage | Every 3-4 months |
| Clean Battery Terminals (if needed) | Every 6 months or Annually |
| Inspect Jumper Cable Condition | Annually (or before/after each use) |
A little regular maintenance can prevent the headache of unexpected battery failures and help your car’s electrical system last longer.
Storing and Caring for Your Jumper Cables

Taking good care of your emergency car jump starters (yep, jumper cables count!) helps them last much longer and work reliably when you need them most. Keeping your long vehicle jump leads in good shape isn’t just about tossing them in the trunk; it involves proper storage, cleaning, and regular checks.
Storing Your Cables Like a Pro
- Keep ’em in a cool, dry place (like the trunk, but ideally in a bag).
- Coil the cables neatly – this prevents tangles and stress on the wires.
- Use the storage bag or case they came with, or get one. It protects them from damage and dirt.
- Try to keep them out of direct sunlight for long periods and avoid extreme hot or cold temps if possible.
Keeping Them Clean and Inspected
Giving your cables a quick look-over now and then is a smart habit. Check for:
- Any visible wear, cuts, or cracks in the insulation. Exposed wire is a no-go!
- Corrosion (that crusty stuff) on the clamps. Clean it off with a wire brush if you see any.
- Any damage to the rubber or plastic insulation around the clamps.
- Make sure the clamps aren’t bent and still spring open and close firmly.
Time for an Upgrade? When to Replace Jumper Cables
| Condition | Action Recommended |
|---|---|
| Cracked/Frayed Cable Insulation | Replace Immediately (Safety Hazard!) |
| Very Old Cables (5-7+ years, depending on use/quality) | Consider Replacing (Materials degrade over time) |
| Badly Corroded or Damaged Clamps | Clean thoroughly; replace if damage is severe or affects connection. |
| Bent Clamps that Don’t Grip Well | Replace. |
“Taking good care of your long vehicle jump leads is cheap insurance against being stranded by a dead battery.”
Pro tip: You can apply a little dielectric grease (available at auto parts stores) to the metal clamp connections. This helps prevent corrosion and ensures a better electrical connection down the road.
Uh Oh… Dealing with a Dead Battery

A dead battery often strikes without much warning, leaving you stuck and frustrated. Knowing the tell-tale signs and having a plan (and the right tools!) is key. With a set of extended length jump cables in your emergency kit, you’re much better prepared to handle these situations.
Warning Signs: Is Your Battery About to Die?
Sometimes your car gives you hints before the battery completely gives up. Keep an eye (and ear) out for these signals:
- Slow Engine Crank: Does the engine sound sluggish or take longer than usual to turn over when you start it? That “ruh-ruh-ruh” sound?
- Dim Lights: Are your headlights, interior lights, or dashboard lights dimmer than normal, especially when starting?
- Clicking Sound: You turn the key, and instead of the engine cranking, you just hear a rapid clicking noise.
- Electrical Gremlins: Power windows moving slowly, radio acting weird, or other electrical components behaving oddly?
When 30 ft Jumper Cables Save the Day
A 30-foot jumper wire set truly shines in emergencies. That extra length is a game-changer when:
- The rescuing car can’t park nose-to-nose or side-by-side with yours.
- You’re parked head-in against a wall or in a tight spot.
- You need to connect to a larger vehicle like a truck whose battery might be harder to reach.
“When standard cables just won’t reach, those extra feet on a 30-foot jumper cable feel like a mile of relief.” – Automotive Safety Experts
Jump Starting Isn’t the Only Option
While jump-starting is common, sometimes it’s not possible or advisable. Here are other options:
-
- Portable Jump Starters: These compact battery packs can jump your car without needing another vehicle. Super handy!
- Battery Chargers: If you’re at home and have time, a trickle charger or battery charger can slowly recharge your battery.
- Roadside Assistance: Services like AAA or insurance add-ons can send someone to help jump-start or tow your car.
- Professional Check: If jump-starting doesn’t work or the battery keeps dying, it’s time to visit a mechanic for testing.
Good quality cables, like some heavy-duty 30 ft options from brands like Energizer, can handle significant power (e.g., 400A) suitable for many vehicles. Investing in a reliable set often comes with peace of mind (and sometimes a warranty!).
Picking the Perfect Jumper Cables for You

Choosing the right 30-feet battery jumper cables isn’t just about grabbing the first set you see. Picking a quality long booster cable pack can make a huge difference when you’re facing a dead battery.
Knowing what features matter is important because not all cables are created equal. Using cheap, flimsy, or incorrect cables could potentially damage your car’s electrical system or just not work when you need them most.
What to Look For: Key Features
- Cable Gauge: This is crucial, especially for long cables. Look for a lower gauge number (like 2 or 4 gauge for 30 ft). Thicker wire = less power loss over distance.
- Clamp Quality: You want strong clamps with good teeth (copper is best) that grip the terminals securely. Make sure the insulation covers most of the clamp to prevent accidental shorts.
- Length & Flexibility: You want 30 feet, but also check if the cable is reasonably flexible, especially in cold weather (some cheap ones get very stiff).
- Amperage Rating: Ensure the cables are rated for the amps your vehicle might need (check your manual, but higher is generally safer/better for larger engines or cold starts).
Long vs. Standard: Why 30 Feet Rocks
Sure, standard 12-16 feet jumper cables are common and usually cheaper. But 30-feet battery jumper cables offer significant advantages, mainly reach and flexibility. They make connections possible in awkward parking situations where shorter cables would leave you stranded.
| Brand Example | Length | Gauge | Approx. Price | Typical Amps |
|---|---|---|---|---|
| VIKING Super Heavy Duty (Example) | 20 ft | 2 Gauge | $40 | 420 |
| ABN Jumper Cables (Example) | 25 ft | 2 Gauge | $39 | 600 |
| Energizer (Standard Example) | 16 ft | 6 Gauge | $20 | 225 |
| *Generic 30 ft Heavy Duty* | *30 ft* | *2 or 4 Gauge* | *$50-$80+* | *600-1000 Amps* |
Note: Prices and specific amp ratings vary widely. Look for 30 ft cables with at least 4 gauge, preferably 2 gauge for versatility.
Brands You Can Trust
Look for established brands known for quality automotive accessories like Energizer, NOCO, CARTMAN, or specialized heavy-duty brands. Experts always recommend investing in high-quality cables for safety and reliability.
“Your jumper cables are a critical piece of safety gear. Don’t skimp on quality; choose wisely.” – Automotive Safety Expert
Seek out cables made with 100% copper conductors (not just copper-coated aluminum) and durable, flexible insulation. A good set might cost a bit more upfront, but it’s worth it for performance and peace of mind.
Thinking Green: Environmental Considerations

Taking care of your car involves more than just knowing how to use 30 ft jumper cables. It also means being mindful of the environment when dealing with old parts like batteries and cables.
Handling Old Batteries the Right Way
Car batteries contain lead and acid, which are harmful if they end up in landfills. They need to be disposed of properly. Here’s what you should do:
- Most places that sell car batteries will take your old one for recycling (often required by law).
- Check with local auto parts stores or recycling centers for battery drop-off points.
- Never, ever just toss an old car battery in your regular trash!
Recycling Old Cables Too!
Your old 30 ft jumper cables, especially if they have copper wire, can also be recycled! Metal recyclers or scrap yards often accept insulated copper wire. Recycling these materials reduces the need to mine new resources and keeps waste out of landfills.
“Every battery and cable we recycle is a small victory for a cleaner planet.” – Environmental Sustainability Expert
Reducing Your Car’s Environmental Impact
Beyond recycling, you can take steps to make your driving greener:
- Maintain Your Car: A well-maintained engine and properly inflated tires improve fuel efficiency. Regular battery checks can extend its life, reducing waste.
- Drive Smart: Avoid aggressive acceleration and braking.
- Consider Fuel Efficiency: When buying a new car, look at fuel-efficient options or hybrids/EVs.
- Replace Parts Responsibly: Use quality parts (like good jumper cables!) that last longer and dispose of old ones correctly.
Making these small efforts helps protect the environment and ensures your essential gear, like jumper cables, stays in good working order.
Got Questions? We’ve Got Answers (FAQs)

Using heavy duty booster cables can bring up a few questions, especially with those extra-long ones. Let’s clear up some common queries about long battery cables and jump-starting.
How Long Should Jumper Cables Stay Hooked Up?
Once you’ve correctly connected the cables and started the working car, let it run for a few minutes (maybe 5) before trying to start the dead car. If the dead car starts, you should disconnect the cables fairly promptly (within a minute or two) using the safe removal procedure. Leaving them connected for excessively long periods after the car has started isn’t necessary and could potentially risk electrical system issues, though modern cars have protections. The goal is just to get the dead car running so its own alternator can take over.
Can You Use Jumper Cables on Hybrid or Electric Cars?
Maybe, but BE CAREFUL! Hybrid and electric vehicles have complex electrical systems and often have specific jump-starting procedures (or may only be able to *provide* a jump, not receive one, or vice-versa).
- ALWAYS consult the owner’s manual first! It’s the definitive guide for your specific model.
- Hybrids often have a standard 12V battery (sometimes in the trunk) that *can* be jumped using specific terminals, but the high-voltage battery system is totally separate.
- Never try to jump the high-voltage hybrid/EV battery.
- Using the wrong procedure could damage sensitive electronics or void your warranty. When in doubt, call roadside assistance specifically trained for hybrids/EVs.
What if the Jump Start Doesn’t Work?
It’s frustrating when the jump doesn’t work! Here’s what to check:
- Double-Check Connections: Are you SURE the clamps are connected correctly (Red to +, Black to -/Ground) and making good, solid contact with clean metal? Wiggle them gently.
- Cable Quality/Gauge: Are your cables thick enough (low gauge) for the vehicles involved, especially if they’re long like 30 ft? Thin cables might not transfer enough power.
- Wait a Bit Longer: Let the good car run for 5-10 minutes while connected to give the dead battery more charging time, then try again.
- Check the Dead Battery: Is it visibly damaged, leaking, or very old? It might be completely beyond saving with a jump.
- Other Issues?: The problem might not be the battery (e.g., starter motor, alternator, fuel issue).
- Call the Pros: If a couple of attempts fail, it’s time to call for professional roadside assistance or a mechanic.
“Safety always comes first when you’re dealing with car batteries and electrical systems. Don’t take risks.”
Keeping a good set of heavy duty booster cables is smart, but knowing these troubleshooting tips can help you navigate those tricky moments.
Jumper Cables in the Real World: Stories & Lessons

Emergency car jump starters and good old jumper cables are lifesavers for drivers stuck with dead batteries. But using them effectively takes a bit of know-how and careful preparation.
Real-life situations involving long vehicle jump leads show just how valuable they can be, but also highlight the challenges drivers can face.
Success Stories: When Long Cables Saved the Day
- Imagine being parked nose-first in a tight spot, battery dead. A rescuer pulls up behind you, but standard cables won’t reach. Bam! Out come the 30-foot jumper cables, easily bridging the gap. Success!
- Truck drivers often rely on extra-long, heavy-duty cables to help fellow truckers or even passenger cars stranded in remote locations where help is far away.
- Think about off-roaders or campers deep in the wilderness. Having long, reliable cables can mean the difference between a minor inconvenience and a serious survival situation.
Learning from Slip-Ups: Common Mistakes
Mistakes happen, but with jump-starting, they can be costly or dangerous. Common errors include:
- Mixing Up Connections: Connecting positive to negative is the classic, dangerous mistake.
- Using Undersized/Damaged Cables: Cheap or damaged cables might overheat, melt, or simply not work.
- Skipping Safety Gear: Not wearing glasses or gloves increases risk. Forgetting to ensure cars aren’t touching.
- Incorrect Grounding: Connecting the final black clamp to the dead battery’s negative post instead of a separate ground point increases the risk of sparks near the battery.
“Good preparation and knowing the correct procedure are your best defenses against a dead battery ruining your day.” – Automotive Safety Expert
Knowing When to Wave the White Flag: Calling for Help
Sometimes, DIY isn’t the answer. Call for professional help if:
- You’ve tried jumping correctly a couple of times, and it’s just not working.
- You see obvious damage to the battery (cracks, leaks, swelling).
- Your car’s electrical system starts acting really strange after the jump attempt.
- You’re genuinely unsure or uncomfortable with the procedure (especially with newer or hybrid/electric cars).
Understanding how emergency car jump starters and cables work empowers you, potentially saving time, money, and hassle.
Wrapping Up: Final Thoughts on 30 ft Jumper Cables
Mastering the safe and effective use of a 30-foot jumper wire set is a valuable skill. It’s really important for vehicle owners to understand that doing it right prevents potential damage and keeps everyone safe. Precision matters when you’re working with extended length jump cables.
Knowing the proper jump-starting procedure is non-negotiable. Mistakes can lead to costly repairs, like damaging the car’s computer (ECU) or causing electrical surges. A reliable 30-foot jumper wire set is a fantastic tool, but only if used correctly.
Safety Isn’t One-Time; It’s Ongoing
Vehicle maintenance and emergency preparedness are continuous responsibilities. Make it a habit to check your jumper cables periodically, understand your car’s specific electrical needs (check that manual!), and stay informed about best practices for jump-starting.
Taking the time to learn and practice the correct techniques protects you, your passengers, and your car’s sensitive electronics. It’s definitely worth the effort!
Knowledge is Power (Especially When Your Battery is Dead!)
Being informed can turn a stressful dead-battery situation into a manageable task. Keep learning about battery technology, your car’s systems, and safe jump-starting methods. This knowledge builds confidence for handling unexpected battery failures.
Ultimately, though, the best way to deal with jump-start emergencies is to try and avoid them in the first place through regular car maintenance and battery checks. Keep your vehicle happy, and hopefully, you won’t need those cables too often!